"Predicting the future isn't magic, it's artificial intelligence" ~Dave Waters
Yes, and machine learning is one of the most fascinating aspects of Artificial Intelligence.
So what is machine learning?
Machine learning leverages the power of statistical modelling to learn patterns in data that can be leveraged to predict outcomes from previously unseen data.

Sounds too jargon-y? Let me break it up for you:
Imagine a situation, where you are one of the decision makers in a business, and you want to increase the company profits for the next quarter, based on various products of your company.
For a few products and observations, you might predict it manually - by seeing patterns in Data.
If you're good at statistics, you may prefer to do the aforementioned predictions by working out some metrics to get a more rigorous proof, rather than working solely on your intuition. But we all know that manual can drive you only so far as one or two logs, right?

This is where machine learning comes to your rescue. It automates all the steps that you'll do while working out the statistical metrics on a larger scale, scaling to hundreds, if not thousands of products, and millions of observations. The end result? Predictions that you can rely on (provided you provided the correct data).
But this is only one aspect of machine learning. There are many more use cases of machine learning.
Where does Python come in here?

Okay, we can all agree on the fact that we all ABSOLUTELY LOVE Python (which is why you may have stumbled on this website in the first place :P)
Jokes apart, Python is one of the easiest languages to prototype your ideas. And with its plethora of libraries and frameworks at our ready disposal, it makes our tasks even easier.
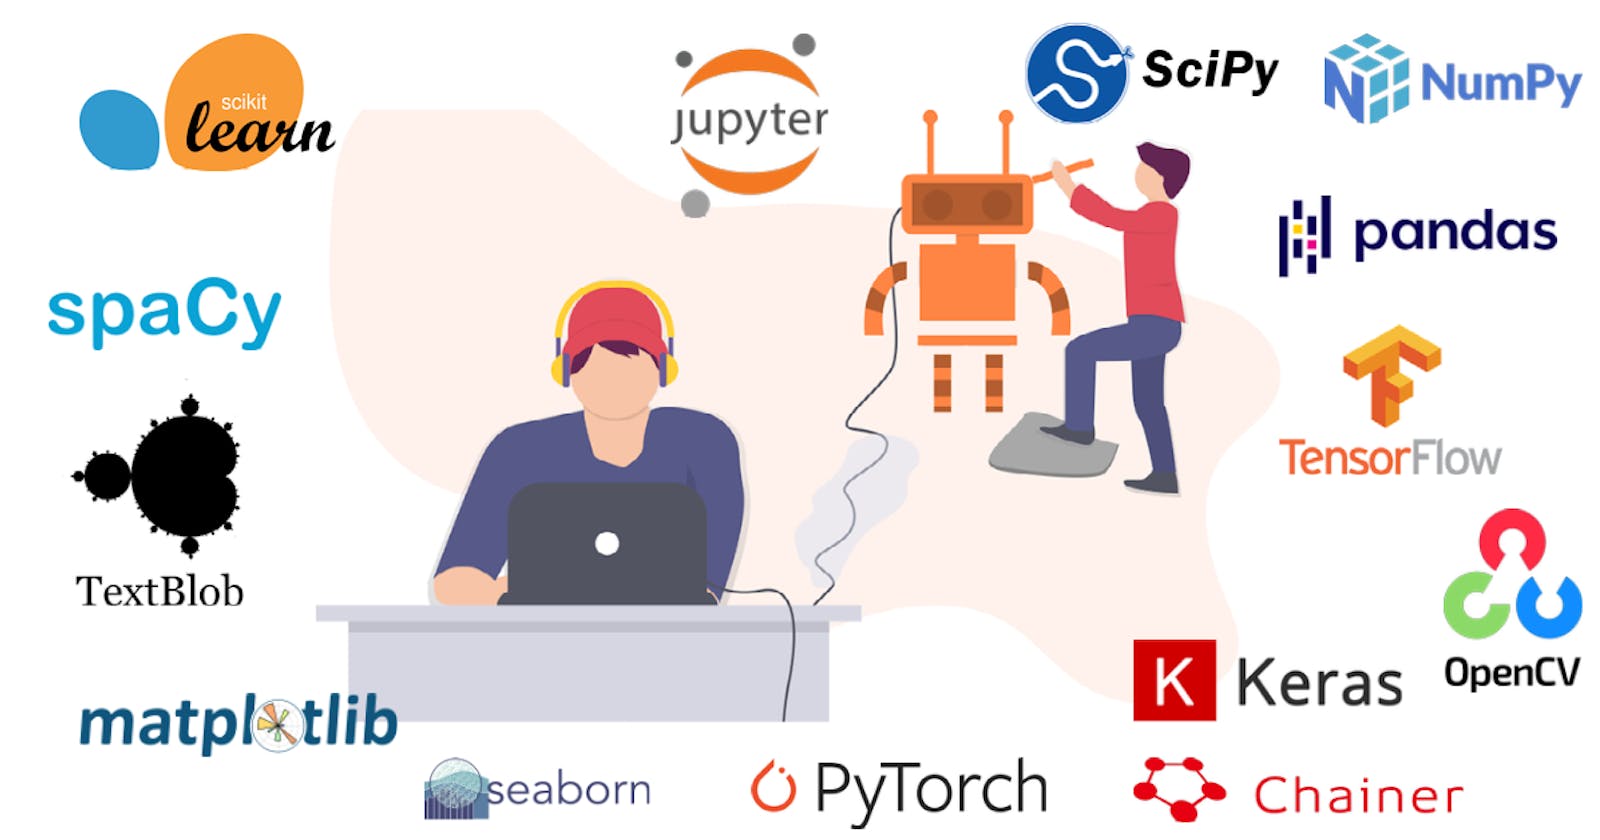
Libraries like matplotlib , scikit-learn , numpy , pandas and scipy make data visualization, large-scale computation, data manipulation and machine learning accessible like never before. Couple them with interactive environments like Jupyter notebooks - you have probably the easiest way to carry out machine learning tasks - it's all upto your creativity now as to what you can do.
In fact, there's even more you can do, but let's not go overboard :P
Talk is cheap. Show me the code.
Okay, enough bantering. So what does a Python Implementation of a machine learning task look like?
Let's use scikit-learn and the Boston dataset for this to predict house prices.
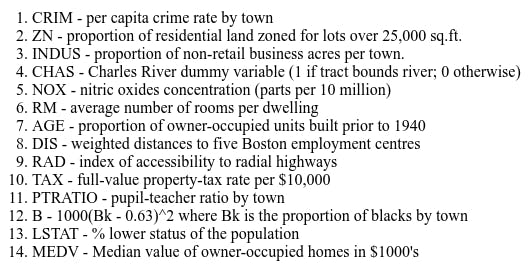
This dataset consists of the following columns:

We have to predict either the NOX column, or the MEDV column, given the other columns.
Consider yourself as a real-estate businessman and enjoy :).
Step 0: Install Python and the dependencies (if you haven't already):
Installing Python:
Download Python from the official Python website
Install it, following the GUI instructions. If you're a Linux user, you'll probably have Python preinstalled in your system.
Installing the dependencies
Open the command prompt of your system. It's CMD (or Powershell) for Windows, Terminal for Mac and Linux.
Type in the following command:
pip install numpy scikit-learn
Here is my output screen on my Linux machine:

If you've completed the above steps without encountering any error message, you're good to go 😃.
Step 1: Import the tools

from sklearn.tree import DecisionTreeRegressor as dtr
We call scikit-learn as sklearn while importing it. DecisionTreeRegressor is a model that reaches the final predictions by a series of consequential decisions - a lot like a family tree.
We also import numpy, as the data will be in the format of numpy arrays.

import numpy as np
Step 2: Import the data
Fortunately, we can use a lot of built-in datasets inside scikit-learn itself. So let's import the Boston housing prices dataset.

from sklearn.datasets import load_boston
data = load_boston()
Step 3: Initialize the model

model = dtr()
Step 4: Fit the model with a part of the data (we'll be using the other part to predict

model.fit(data.data[:400], data.target[:400])
Step 5: Predict using the data
Let us consider the entries in the dataset from 400th index to test:

model.predict(data.data[400:])
Step 6: Test the model
Let's see how much the predictions match with the real values:

np.isclose(model.predict(data.data[400:]), data.target[400:], atol=5, equal_nan=True)
As we can see, if we set the threshold of error in the predictions to around ±5 (ie., 5000 dollars), most predictions are correct. The ones that aren't, are the outliers in our data (which are very few, as you can see).
Bonus: Visualizing the model
Since we have made a Decision Tree, we can visualize it. You can visualize the model using an awesome service called WebGraphViz!
I have moved the code to the comments, otherwise the post will unnecessarily get long. 😅
Conclusion
Congratulations for building your first machine learning model! As you have seen, machine learning can be a great tool to help you figure out various stuff, which will be tedious if done manually.
Now that you have built your first machine learning model, you can explore further about concepts like underfitting and overfitting. Google, YouTube (and of course, PyCon) are your friends. 😃
Bye for now!
Ron

